.png?width=2000&height=500&name=Compliancy%20Group%20logo%20(3).png)
The Vendor Module enables organizations to efficiently manage vendors, store documentation, track approval statuses, and monitor exclusion match results.

TABLE OF CONTENTS
- Creating a Vendor Profile
- Bulk Importing Vendors
- Vendor Profile Overview
- Uploading a New Agreement
- Sending a Vendor Questionnaire
- Exporting Vendor Reports
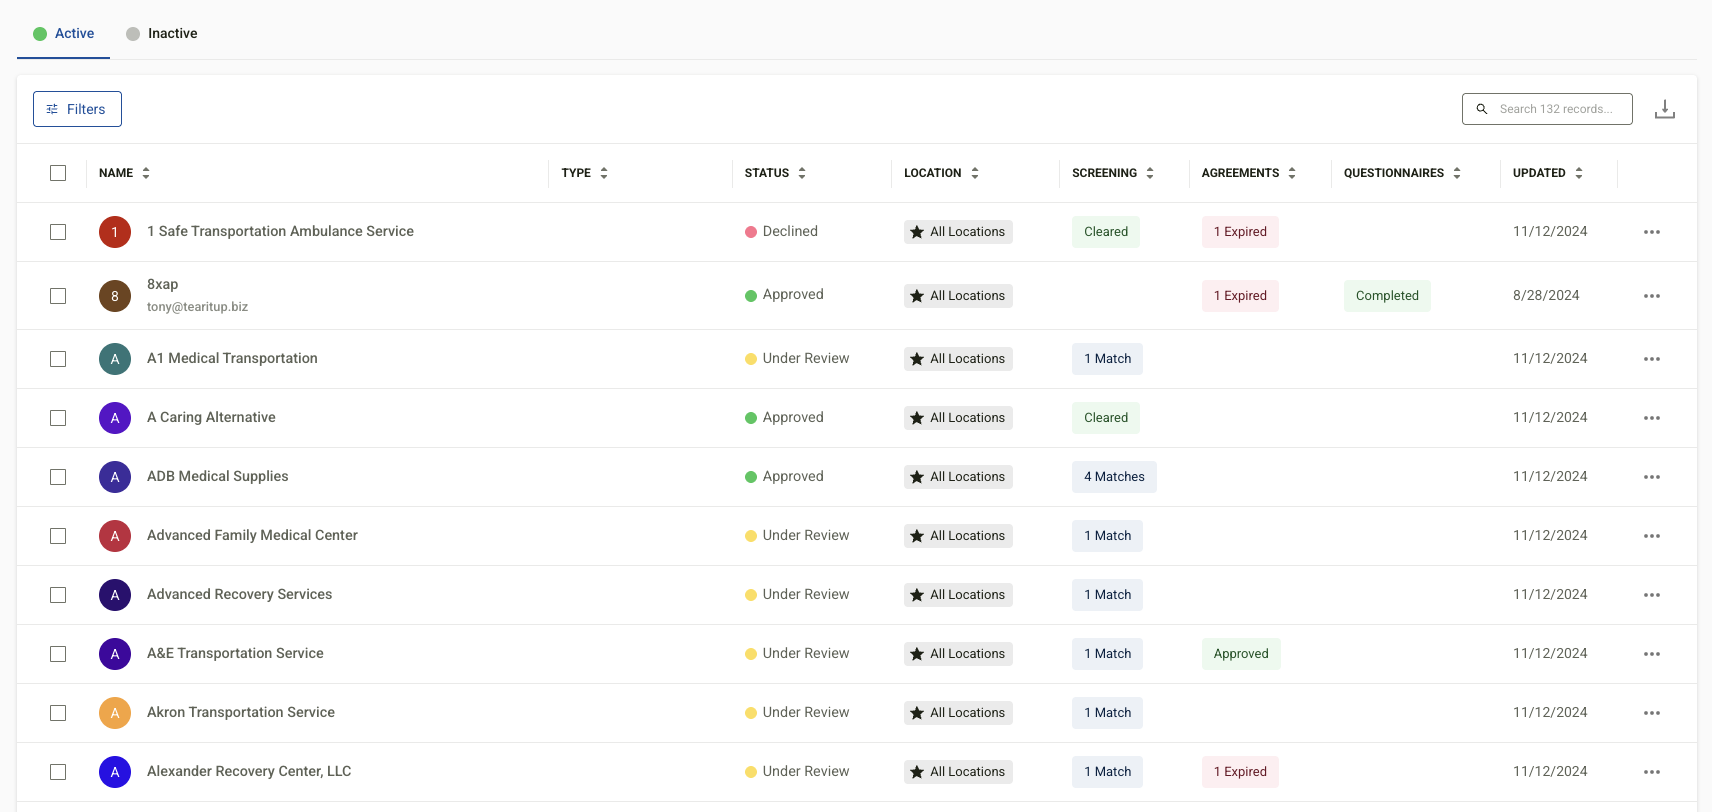
When vendors are added to the module, they appear in a comprehensive list that displays key details, including:
- Vendor Name
- Type
- Approval Status
- Location
- Exclusion Status
- Agreements
- Questionnaires
- Last Updated Date
An ellipsis button (⋮) on the right-hand side of each vendor entry provides options to:
- Edit
- Approve
- Decline
- Deactivate
Users can switch between Active and Inactive Vendors using tabs at the top. Filters can be applied to sort vendors by:
- Agreement Type
- Location
- Approval Status
- Vendor Type
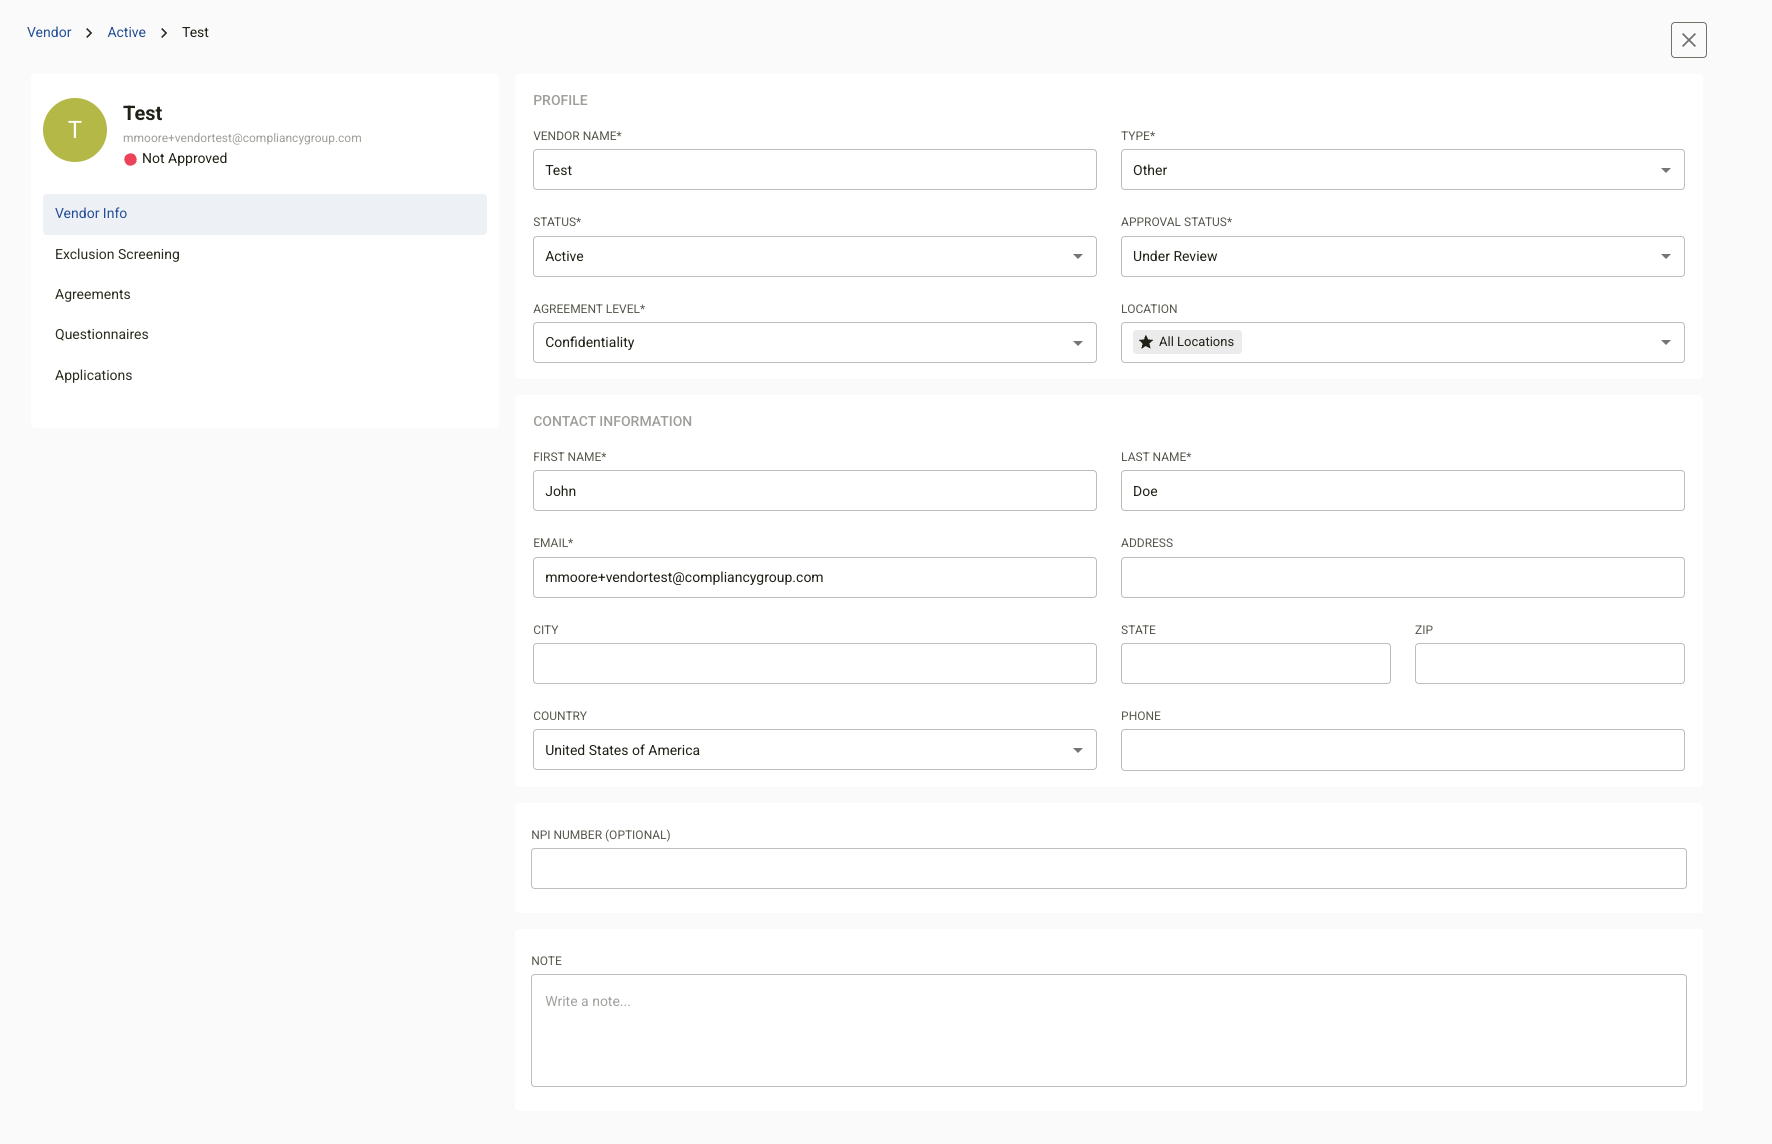
Creating a Vendor Profile
To create a new vendor profile:
- Navigate to the Vendors section.
- Click + New Vendor.
- Complete the required fields: Profile
- Name – Enter the vendor's name
- Type – Select from the dropdown
- Web Address – Enter the vendor's website (optional)
- NPI – Enter the NPI number if applicable
- Address, City, State, Zip Code, Country – Enter the full vendor address
- Agreement Level Requirements – Check all that apply: Business Associates Agreement, Confidentiality Agreement, Master Service Agreement, or Other Underlying Contract
- Data Access Level – Select Yes or No from the dropdown
- Specify Data Access – Check all applicable data types: Financial Data, PHI (EPHI), Employee Data, Confidential Data, PII, or Source Code
- Business Impact – Select from the dropdown ( Low, Moderate, High, Critical)
- First Name and Last Name
- Email and Phone Number
- Type – Select the contact type from the dropdown ( Administrative, Billing, Compliance/Legal, Technical, Procurement, Other)
- Check Set as Primary if this is the primary contact
- Use the + button to add additional contacts if needed
- Status – Set to Active or Inactive
- Vendor Approval – Select from the dropdown (e.g., Approved, Under Review, Declined)
- Owner – Search and assign the team member who will be the owner by name or email
- Locations – Select All Locations or a specific site
- Click Create Vendor.

Bulk Importing Vendors:
Vendors can also be added in bulk using the provided spreadsheet template.
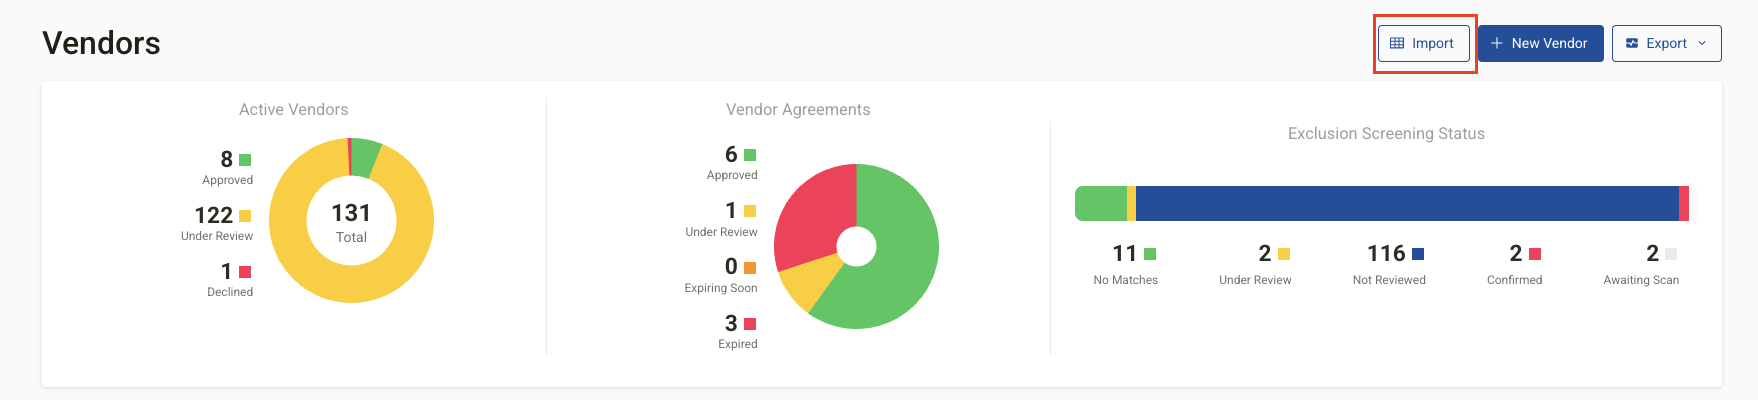 To Download the Template:
- Navigate to the Vendors module.
- Select Import in the upper-right corner.
- Click Download Template.
- Fill in the necessary fields in the spreadsheet.
To Upload the Template:
- Return to the Import section.
- Click Choose Spreadsheet.
- Upload the completed file.
Once uploaded, new vendors will appear in the Active Vendor List.
Vendor Profile Overview
Selecting a vendor from the list opens their profile, which includes:
- Vendor Name
- Type
- Status
- Approval Status
- Profile Information
- Exclusion Matches
- Agreements
- Questionnaires
- Associated Applications (if applicable)
Uploading a New Agreement
To add a new agreement:
- Open the vendor's profile.
- Go to the Agreements tab.
- Click New Agreement.
- Enter the following details:
- Agreement Name
- Owner(s) – Start typing to search and select an owner
- Type – Select from the dropdown ( BAA, NDA, NSA, Other)
- Enacted Date – Enter in MM/DD/YYYY format
- Status – Select the current status (Approved, Disapproved, Expired)
- Expiration Date – Enter in MM/DD/YYYY format
- Termination Notice Period – Select from the dropdown (e.g., 60 Days)
- Upload the agreement document by dragging and dropping the file into the upload area, or click Browse to locate the file.
- Click Save.

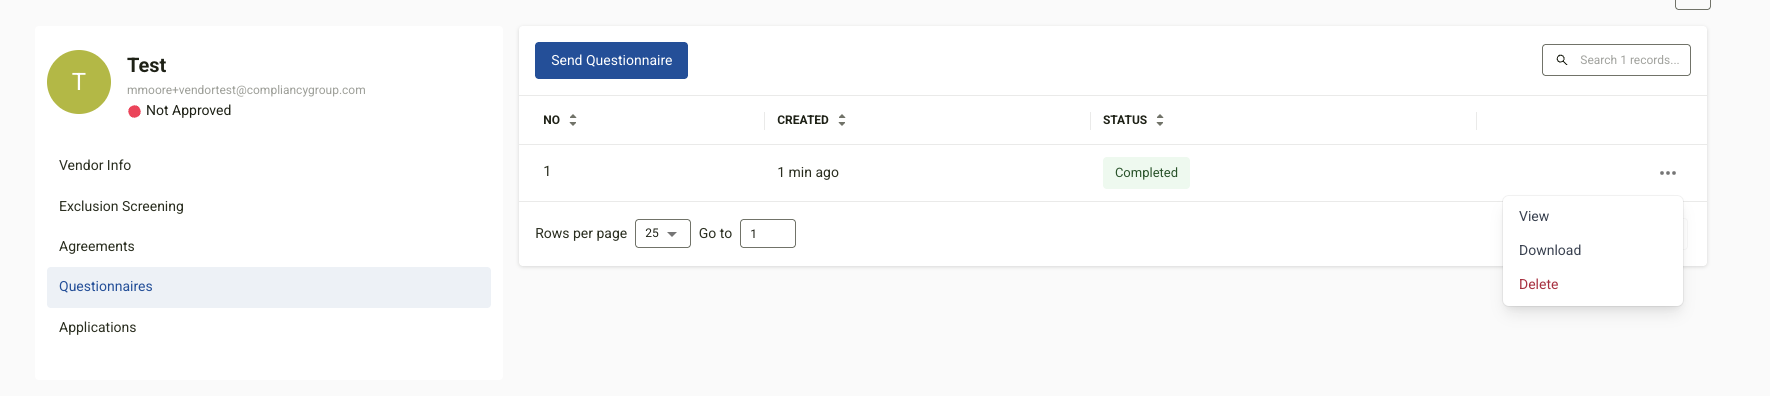
To send a questionnaire to a vendor:
- Open the vendor’s profile.
- Go to the Questionnaires tab.
- Click Send Questionnaire.
- Review the questionnaire, then click Send Questionnaire.
Once completed by the vendor, the questionnaire status will update to Completed. Use the ellipsis menu (⋮) next to the questionnaire to:
- View
- Download
- Delete
Exporting Vendor Reports
Vendor reports can be easily exported from the Vendor Module.
To export a report:
- Navigate to the upper right-hand corner of the Vendor Module.
- Select Export.
- Choose your desired format:
-
- CSV